

How to make a laptop keyboard backlight
 If
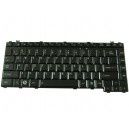
you've ever wanted to be able to type in the dark without having to switch on a bright light to see the keyboard, then you might be looking for a way to backlight your laptop's keyboard from
within. This will give you just the outline of the laptop keyboard, but since most of us can operate a keyboard quite
well as long as we can see the general layout of the keys, this shouldn't be a problem.
If
you've ever wanted to be able to type in the dark without having to switch on a bright light to see the keyboard, then you might be looking for a way to backlight your laptop's keyboard from
within. This will give you just the outline of the laptop keyboard, but since most of us can operate a keyboard quite
well as long as we can see the general layout of the keys, this shouldn't be a problem.
Attach the LED and resistor to the circuit board, and entwine one lead from each together. Attach the other lead from the LED to one of the battery pack's wires.
Connect the other battery pack wire to the "Off" pole on the switch, and run another length of insulated copper wire from the "On" pole of the switch to the one remaining resistor lead. Your
circuit is now complete, albeit unpowered.
Pop in the four batteries and click the switch on to test your circuit. Turn the switch off, take out the batteries, and solder all the connected leads together as close to the underside of the
board as possible. Snip off any excess lead metal with the wire cutters.
Open your laptop case with the screwdriver and put your newly constructed LED circuit in a tactical location, somewhere when lit, the LED will shine between the keyboard keys and the circuit
board beneath them.
Close your case and make sure the switch is outside the case once it's closed. Stick the switch to the side of the computer casing with a strip of sticky foam.
Things You'll Need:
* 1-inch by 2-inch circuit board
* 5-mm LED (any color)
* 330-ohm resistor
* Single-pole, single-throw (SPST) switch
* Insulated low-voltage copper wire
* 4-AA-battery holder
* 1.5-volt AA batteries, 4
* Wire cutters
* Soldering iron and solder
* Small flat-tip screwdriver
* Double-sided sticky foam
Tips & Warnings
To avoid pinching the switch-wires, drill a small hole in the case to thread them through.
Opening your laptop's case will void most warranties, so be sure of the consequences before you attempt this project.